Cocoa Butter Lip Balm Recipe Without Beeswax
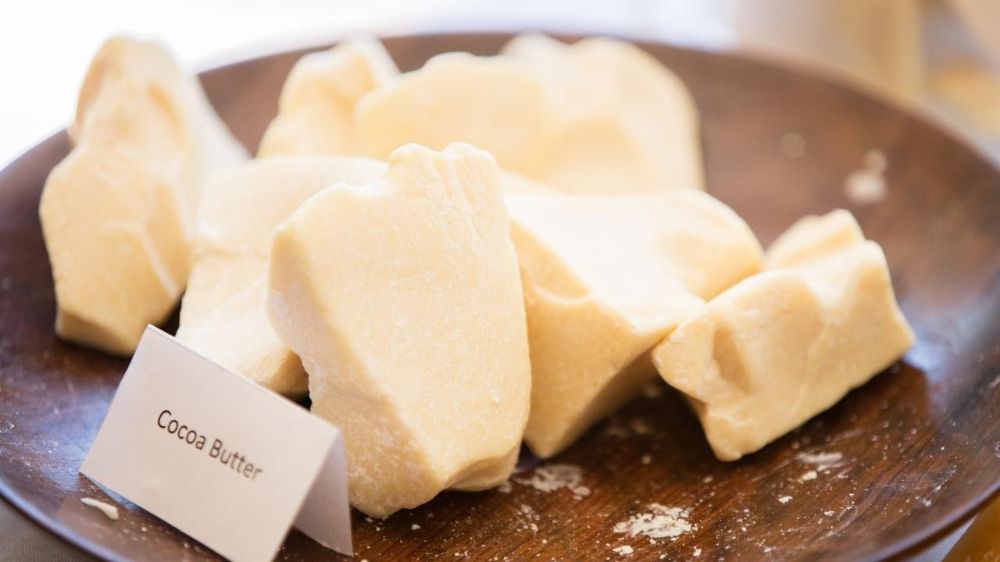
We love using cocoa butter in our DIY lip balm recipes since it smells fabulous and works wonders when it comes to moisturizing dry lips. Since it’s comprised of oleic, palmitic, and stearic acids as well as vitamins and minerals, cocoa butter can help prevent inflammation, protect your lips from the elements, and keep them soft.
Beeswax is used often in DIY lip balms since it has a lot of moisturizing properties, but more and more people are opting out of using it in favor of beeswax alternatives. If you’re sensitive to beeswax or you want to use vegan sources as a more environmentally sustainable option, there are several alternatives you can consider using in your homemade cocoa butter lip balm recipe.

Beeswax Alternatives
Since beeswax acts as the solidifying agent in lip balm, you need to replace it with another oil that can keep your ingredients solid. The most common beeswax replacements are:
Carnauba Wax
Carnauba wax is derived from the carnauba palm that is native to Brazil. It hardens well and has a high melting point, which makes it a perfect alternative to beeswax. Because of its high melting point, it won’t melt or burn your lips if it gets hot and will keep your lip balm ingredients together.
Soy Wax
Soy wax is made from soybean oil. Thanks to the fatty acids found in soybean oil, this wax has a high melting point and a smooth, silky texture. It’s one of the most eco-friendly options and also provides a lot of hydration for your lips.
Candelilla Wax
Candelilla wax is derived from the Candelilla plant grown in Mexico and the southwestern United States. It is a hard wax that can firm your lip balm while also adding shine to your lips.
Olive Wax
Olive wax is made from olive oil. It is high in fatty acids, which makes it a hard wax with a slightly lower melting point than beeswax, but it has a great texture that helps soften lips.
DIY Cocoa Butter Lip Balm
Now that you know the different types of beeswax replacements you can use in your homemade lip balms, we want to share our absolute favorite cocoa butter lip balm recipe with you.
This lip balm uses candelilla wax, olive oil, and castor oil to keep your lips shiny and hydrated all day. It also uses cocoa butter, which is a great natural moisturizer that helps soothe and cleanse your lips, and – bonus – it smells like chocolate! We’ve also added spearmint essential oil for an extra boost of fragrance and healing.
Ingredients:
- 1 part cocoa butter
- 1 part candelilla wax
- 2 parts olive oil
- 1 part castor oil
- 15 drops of spearmint essential oil
Steps:
- Add the cocoa butter and candelilla wax to a double boiler over low heat and melt until combined
- Add the olive oil and castor oil and stir, making sure not to overheat
- Remove from heat and add the spearmint essential oil
- Pour into lip balm tubes or any other type of container you’d like to use
- Allow to cool and solidify for around 30 minutes
And that’s it! Make sure the mixture has fully cooled inside of the containers before attempting to use it since using it while it’s still too hot can burn your lips and spill everywhere since the mixture won’t be fully solidified yet.
Why use cocoa butter in lip balms?
Our lips lack a protective outer layer like the one our skin has, so they’re much more vulnerable to the natural elements that can suck out our moisture, like wind and sun exposure. Since cocoa butter contains natural emollient properties, it can act as that much-needed protective barrier by supplying and retaining our lips’ natural moisture. It also contains important vitamins like vitamins A, C, and E, which help heal your lips and may even slow the signs of aging.
How long does homemade cocoa butter lip balm last?
DIY lip balms are a much more cost-effective and customizable alternative to the store-bought stuff, but many people aren’t sure how long they’re good for. Since there aren’t any synthetic preservatives in them, homemade lip balms do have a shorter shelf-life than lip balms purchased at a store.
Homemade lip balms should be used within three months. If you’re unsure how long you’ve had the lip balm, or it starts smelling different, you should toss it out to avoid accidentally ingesting expired ingredients.
Share on Pinterest

About the Author: Jenni Mac
Hi, I’m Jenni! I am a health and beauty blogger that loves making homemade beauty products. I have been blogging for over five years now about natural products, DIY skin care, inner beauty, and anything else to do with natural living.
Here you will learn all about DIY lip balm! From DIY recipes, to recipes for lip scrubs and glosses, this site has it all! With witty posts about how to take care of your lips in the winter and summer, you'll find everything you need to keep them happy and healthy.
2024 © DIY Lip Balm
