How to Make Liquid Lip Gloss at Home - Easy DIY Recipe
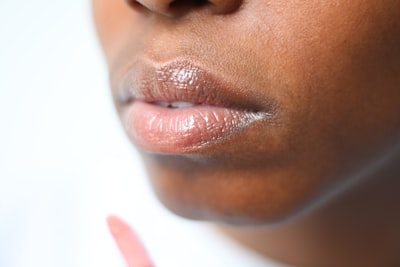
Homemade lip gloss is so much fun to make since you can customize it any way you like. While there are a handful of ingredients necessary to make a good lip gloss that glides on smoothly and leaves your lips shiny, the specific ingredients are entirely up to you.
You can make your own lip gloss at home following this easy lip gloss recipe, and it will cost you much less than what you would pay for in a beauty store. But even more importantly, you’ll know exactly which ingredients are going into your lip gloss, so you can ditch synthetics and artificial flavorings for good!
If you’re ready to start making your own custom lip gloss at home, check out our easy recipe below.
Easy Homemade Lip Gloss Recipe
This recipe yields about 13 tubes of 10 ml lip gloss and takes around half an hour to make, but you can make smaller batches by scaling down the ingredients. For example, if you only want to make a few tubes of lip gloss, reduce each ingredient by a quarter.
Ingredients:
- 4 tbsp grapeseed oil or olive oil
- 2 tbsp unrefined coconut oil
- 2 tbsp shea butter or cocoa butter
- 2 tbsp cosmetic grade beeswax or a beeswax alternative
- 6 drops of orange essential oil
- 1/8 tsp red mica powder (for coloring – optional)
Steps:
- Add the oil, butter, and beeswax to a glass measuring cup or any other glass jar that allows you to pour easily.
- Place the measuring cup in a pot filled with 2 inches of water – this is known as a double boiler and can help you melt the ingredients more evenly.
- Melt over medium heat for around 10 to 15 minutes.
- Add the essential oil and red mica powder. Mica powder is a natural mineral powder that adds color to your lip gloss, so the more you add, the darker the shade will be. The essential oil is used to give your lip gloss fragrance but can also provide great benefits for your lips.
- Mix everything well until it’s evenly melted and pour into lip gloss containers.
- Allow the mixture to cool for at least 20 minutes before applying.
Make sure to work quickly while making lip gloss since the ingredients can harden quickly once taken off the stovetop. To get the best results, have all of the ingredients and lip gloss containers ready to go before starting. Place the lip gloss tubes upright and open them so that you can easily pour the mixture in when the time comes.
Are you ready to customize your lip gloss?
You can experiment with different lip-safe essential oils for a wide variety of scents and health benefits! Mica powder also comes in several different colors, so you can mix and match your favorite shades.
The best part about this easy recipe is that you can substitute just about any ingredient listed for a comparable alternative. For example, some people are sensitive to beeswax, so you can use candelilla wax instead. If you don’t like grapeseed oil or olive oil, you can use castor oil or jojoba oil. There are so many fantastic all-natural ingredients out there that you can experiment with to find the absolute best DIY lip gloss recipe for your lips.
A note on essential oils
Adding essential oils to your lip gloss is entirely optional, but they can be a great source of both fragrance and hydrating benefits. However, when it comes to making lip gloss at home, it’s important to avoid any essential oils that are sensitizing or phototoxic.
Sensitizing oils can cause irritation, itching, and redness, while phototoxic oils can cause your skin to become more sensitive to harmful UV rays. While these oils can be safe to use if diluted properly, it’s best to avoid them altogether in DIY lip gloss recipes since the lips are an especially sensitive part of the body.
When using essential oils in your lip balm, research if they’re safe to use on your lips before adding them to your recipe, and always make sure to dilute properly.
How long will homemade lip gloss stay good?
Since homemade lip gloss does not contain any preservatives, it does have a shorter shelf-life than store-bought options. Typically, you should try to finish it or discard it within a month, but if it isn’t exposed to any water then it will stay fresh longer than that.
Share on Pinterest

About the Author: Jenni Mac
Hi, I’m Jenni! I am a health and beauty blogger that loves making homemade beauty products. I have been blogging for over five years now about natural products, DIY skin care, inner beauty, and anything else to do with natural living.
Here you will learn all about DIY lip balm! From DIY recipes, to recipes for lip scrubs and glosses, this site has it all! With witty posts about how to take care of your lips in the winter and summer, you'll find everything you need to keep them happy and healthy.
2024 © DIY Lip Balm
Terms / Privacy Policy / Disclaimer
Other Posts